

How to Maintain Embroidered Linens: A Complete Guide
Table of Contents
- How to Wash Embroidered Linens Without Damaging the Stitching
- How to Remove Stains from Embroidered Fabric Safely
- How to Store Embroidered Linens for Long-Term Preservation
- How to Keep Embroidery from Unraveling
- Drying and Pressing Embroidered Linens Correctly
- Displaying Embroidered Linens Safely in Your Home
- Conclusion: Building a Care Routine That Lasts
- Frequently Asked Questions
How to Keep Embroidery from Unraveling
- Match the Repair to the Problem
- The Basic Tacking Technique
- What Not to Do
- Backing and Interfacing
- Preventing the Next Repair
- Drying and Pressing Embroidered Linens Correctly
- Displaying Embroidered Linens Safely in Your Home
- Conclusion: Building a Care Routine That Lasts
- Frequently Asked Questions
Last Updated: October 9, 2026
How to Wash Embroidered Linens Without Damaging the Stitching
Hand washing is the safest way to clean embroidered linens, though a gentle machine cycle works for sturdy pieces.
Here is the short version of how to maintain embroidered linens:
- Use cool water and a mild, pH-neutral detergent
- Never wring, twist, or scrub the stitched areas
- Soak for 10 minutes, then rinse until the water runs clear
The longer version matters more. Embroidery floss is thread, and thread weakens with heat, friction, and harsh chemicals. Cool water and bleach-free detergent protect fiber integrity, while gentle agitation keeps stitches from snagging.
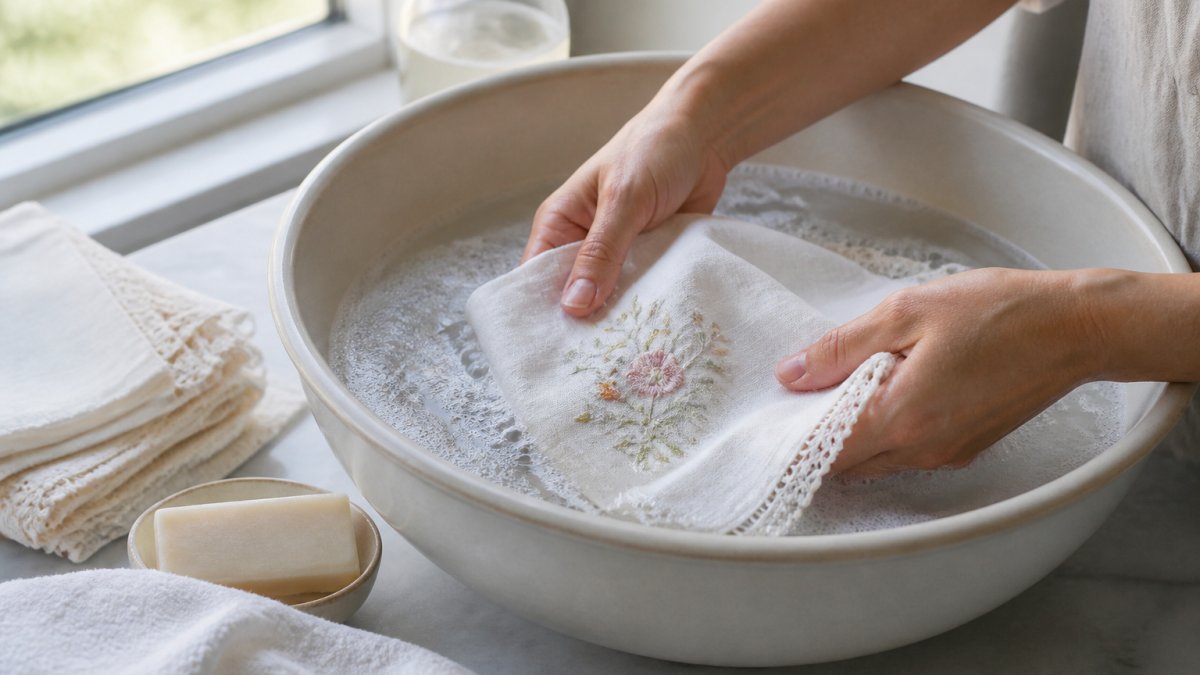
Close-up of hands gently hand-washing an embroidered linen napkin in a basin of cool water with mild detergent, soft bubbles visible, natural light from a nearby window
Hand Washing vs. Machine Washing: What Works Best
Hand washing wins for vintage textiles, fragile needlepoint, and anything with loose or raised stitching. Machine washing is fine for newer, tightly stitched pieces, but only on a delicate cycle with cold water and a mesh laundry bag.
A common mistake is tossing embroidered napkins in with towels; friction from heavy cotton pulls at floss and hemstitched edges. Wash embroidered pieces alone or with other delicates, and skip fabric softener, which leaves a film that dulls thread color.
How to Remove Stains from Embroidered Fabric Safely
Act fast, stay gentle, and never rub. Most fresh stains lift with cool water and mild detergent; set-in stains need patience, not force.
Work from the back of the fabric when you can. Place a clean white cloth under the stain, press a damp cloth with mild detergent against the back so the stain transfers down, then rinse well.
- Grease: blot with a drop of mild dish soap, then rinse
- Red wine or juice: flush with cool water immediately, then soak
- Protein stains: soak in cool water with a pH-neutral detergent
Never use chlorine bleach on embroidery floss. It breaks down fibers and causes fabric yellowing over time.
Spot Testing and Colorfastness Checks
Test every cleaning method on a hidden corner first. Colorfastness varies by thread dye and fabric, and a five-minute test saves a ruined heirloom.
Dampen a cotton swab with your cleaning solution. Press it on the fabric backing or an inside hem for 30 seconds. If color transfers to the swab, stop and use plain cool water instead.
How to Store Embroidered Linens for Long-Term Preservation
Store clean, flat, and acid-free. The wrong box and paper cause yellowing and fiber damage over years, usually invisible until it is irreversible.
Linen and cotton are cellulose fibers. Against acidic paper, cardboard, or wood, acid migrates into the fiber and breaks the cellulose chains, showing up as brittleness and brown foxing spots.
Wash and fully dry each piece before storing; even faint residue of body oil, starch, or detergent attracts pests and speeds aging. Then layer:
- Line the box with acid-free tissue paper, not newsprint or standard gift tissue
- Place a sheet of acid-free tissue between each folded piece
- Avoid folding along the same line every time, refold on a slightly different axis each year so stress does not concentrate on one crease
Never store embroidered linens in plastic, vacuum-sealed, or dry-cleaning bags; plastic traps moisture and off-gassing, inviting mildew and setting yellowing.
Pest Prevention and Mildew Control
Cedar blocks and lavender sachets help deter moths, but they are a supplement, not a defense.
Know what you are defending against:
- Silverfish feed on starch and cellulose and leave irregular holes and yellowed trails. They thrive in damp, dark spaces, so a dry box is the first line of defense.
- Clothes moths (the larvae, not the adults) eat protein and cellulose fibers and leave webbing or grainy frass. Cedar and lavender oils deter them at close range but lose potency as they evaporate, so refresh sachets annually.
- Carpet beetles prefer soiled or protein-rich fabric, which is another reason to store only fully clean pieces.
Mildew prevention comes down to airflow and humidity control. In a humid climate, add a silica gel packet to the storage box and replace it every few months, or use a rechargeable desiccant canister dried per the manufacturer's instructions.
Any musty smell means moisture got in. Air the piece in indirect light before storing again, and inspect the box lining for damp spots.
When to Stop DIY and Call a Textile Conservator
Most household linens can be maintained at home. But some pieces cross a line where DIY handling does more harm than good. Consider professional help when:
- The piece has significant monetary or family value, such as a documented antique or a wedding heirloom
- You see active pest infestation, widespread mildew, or dye bleeding that has already spread
- The fabric is shattering, powdery, or splitting along fold lines
A conservator stabilizes a piece rather than restoring it to look new, and that distinction matters for heirlooms. Look for training in textile conservation, a regional conservation center, a museum-affiliated conservator, or a professional conservation guild, and ask for a condition report before any treatment. For high-value pieces, a consultation usually costs far less than reversing a home cleaning mistake.
Victorian Monogram Linen Napkins →
Smithsonian Museum Conservation Institute guidance on caring for textiles
How to Keep Embroidery from Unraveling
Stop unraveling at the source by handling the back of the fabric with care. Loose threads on the reverse side are the first sign of trouble, and most unraveling starts there long before it shows on the front.
Embroidery floss is plied thread, several strands twisted together. When a stitch snags, the twist loosens and the plies separate, leaving far less tensile strength; a single pull can walk the stitch back through the fabric.
Match the Repair to the Problem
Not every loose thread needs the same treatment. Identify which of these you are looking at before you touch it:
- A snag is a loop of floss pulled up from the surface. Do not cut it. Work it back to the reverse side with a blunt needle or the eye end of a sewing needle, then secure it from behind.
- A loose end is a tail of floss that has come free of the fabric. Trim it to leave a short tail of about a quarter inch, then tack it down from the back with a matching thread.
- A pulled stitch is one that has tightened and distorted the surrounding fabric. Ease the fabric flat with your fingers first, then re-secure the stitch from the back so it sits at its original tension.
The Basic Tacking Technique
For most loose stitches, the repair is the same:
- Thread a fine needle with matching embroidery floss, using a single strand for delicate work.
- Work from the back of the fabric so your repair does not show on the front.
- Take two or three small stitches through the loose thread and into the ground fabric, catching the thread without pulling it tight.
- Knot off on the back, or weave the tail under existing stitches to secure it without a knot.
- Do this while the fabric is dry, not damp. Damp linen stretches, and a repair made on damp fabric will pucker when it dries.
What Not to Do
- Never cut a loose thread flush to the fabric. You remove the tail you need to secure it, and the stitch can continue to unravel.
- Never pull a snag tight to "fix" it. That distorts the surrounding stitches and can tear the ground fabric.
- Never use superglue, fabric glue, or iron-on adhesive on embroidery. These stiffen the thread, discolor over time, and make future conservation work much harder.
- Never iron directly over a loose or raised stitch. Heat flattens the thread and can set a distortion permanently.
Backing and Interfacing
For pieces with fusible interfacing or a fabric backing, check that the backing stays attached. If it lifts, a light press with a pressing cloth re-adheres it: low heat, press from the back, and let the piece cool flat before moving it. If the backing has separated across a large area or the adhesive has failed completely, re-fusing at home risks scorching the embroidery, a conservator can re-line the piece with a stable, acid-free backing instead.
Preventing the Next Repair
The best repair is the one you never have to make. Rotate pieces so no single item takes all the wear, wash embroidered linens separately from towels and heavy cotton, and store them flat with padding at the folds. Check the reverse side during your twice-yearly inspection, that is where the first loose thread will appear.
Drying and Pressing Embroidered Linens Correctly
Air-dry flat, then press from the back. Heat and hanging both distort embroidery, so drying matters as much as washing.
Lay the piece flat on a clean towel or drying rack. Skip the clothesline, where the weight of wet fabric stretches stitched areas.
For pressing, place the embroidered side face down on a thick towel. Cover it with a pressing cloth.
Displaying Embroidered Linens Safely in Your Home
Display away from direct sun and rotate pieces every few months. UV light fades thread faster than almost anything else; a single bright window can dull color within a season.
Frame heirloom pieces behind UV-filtering glass with an acid-free mat. A Library of Congress guide to caring for textiles offers detailed guidance on light, humidity, and framing for long-term display.
Our Victorian Monogram Linen Napkins are built for exactly this balance: hemstitched edges, a 55% linen and 45% cotton blend, and a classic monogram that holds up to regular use and gentle washing.

Victorian Monogram Linen Napkins
Conclusion: Building a Care Routine That Lasts
The real challenge with embroidered linens is not one wash or one stain. It is consistency over years, and most people give up on a routine before it becomes a habit.
At Embroidery Studio Plus, we make that easier with pieces designed for real care: handcrafted monogramming, premium 55% linen and 45% cotton blends, and hemstitched edges that hold their shape. Our Hibiscus Embroidered Linen Napkins and Floral Monogram Linen Napkins are made to be used, washed, and handed down.


Subscribe to our emails for more care guides and early access to new embroidered linens.
Frequently Asked Questions
Can embroidered linens go in the washing machine?
Yes, but with precautions. Use a delicate cycle with cool water and a mild, pH-neutral detergent. Place the item inside a mesh laundry bag to protect the embroidery from agitation. Avoid bleach and fabric softeners, which break down fibers over time. If the piece is vintage, hand-stitched, or has fragile floss, hand washing in cool water with gentle agitation is safer. Always test colorfastness on a hidden corner first.
How do you keep embroidery from unraveling or fading?
Prevent unraveling by checking for loose threads after each wash and trimming them carefully with small scissors. Avoid pulling on the embroidery. For fading, wash in cool water, dry away from direct sunlight, and store pieces in acid-free tissue paper inside a dark, cool space. Never hang embroidered linens in bright light for long periods. If a stitch comes loose, repair it promptly with matching embroidery floss before the damage spreads.
How should you store embroidered linens?
Store clean, completely dry linens flat or rolled in acid-free tissue paper. Avoid folding along embroidered areas, as creases can weaken threads. Use a breathable cotton storage bag or a lined archival box. Keep them in a cool, dry place away from direct sunlight and humidity. Add lavender sachets for pest prevention, but never place them directly against the fabric. Check stored pieces every six months for signs of mildew or pests.
How do you remove stains from embroidered fabric?
Act quickly by blotting the stain with a clean, damp cloth, never rubbing. For most stains, soak the item in cool water with a mild, bleach-free detergent for 15 to 30 minutes. For stubborn stains, apply a small amount of pH-neutral detergent directly to the spot and work it in gently with your fingertips. Always spot test on a hidden area first. Rinse thoroughly in cool water and air-dry flat. Avoid hot water, which sets stains and can damage embroidery floss.