

7 Authentic Handcrafted Embroidery Techniques to Master
Last Updated: November 8, 2026
Quick Summary
Handcrafted embroidery is the practice of decorating fabric by hand with a needle and thread, building pattern and texture stitch by stitch rather than printing or machine-stitching a design. It covers counted-thread work, surface stitching, and regional styles passed down through families and workshops. Every piece carries small human variations that read as quality, not error.
- Start beginners on five stitches: running, backstitch, chain, satin, and buttonhole stitch.
- Embroidery splits into counted-thread work, surface work, and regional styles with local materials and motifs.
- Test your transfer method on a scrap of the same fabric before committing to the real piece.
- Hoop fabric firm like a stretched canvas, not drum-tight, to prevent puckering.
- Wash embroidered linens in cool water with mild detergent and skip bleach and fabric softener.
Table of Contents
- Why Authentic Handcrafted Embroidery Still Matters
- Hand Embroidery Techniques for Beginners: Your First Stitches
- Types of Embroidery Techniques: From Counted-Thread to Surface Work
- Hand Embroidery Tools and Materials That Hold Up
- How to Transfer Embroidery Patterns Without Damaging Fabric
- Troubleshooting Puckering, Loose Stitches, and Fabric Slips
- Finishing, Care, and Long-Term Preservation of Handcrafted Embroidery
- Choosing Your First Handcrafted Embroidery Project
- Frequently Asked Questions
Why Authentic Handcrafted Embroidery Still Matters
Authentic handcrafted embroidery techniques reward patience with something no machine can copy: slight variations in tension, thread and stitch direction that give each piece its own character. At Embroidery Studio Plus, we keep returning to the same conclusion.
Handcrafted embroidery is the practice of decorating fabric by hand with a needle and thread, building pattern and texture stitch by stitch rather than printing or machine-stitching a design.
Why does it still matter in a world of fast production? Three reasons stand out:
- Every piece carries small human variations that read as quality, not error
- Handwork lets a design adapt to the fabric in front of you
- The craft connects a maker to traditions that stretch back centuries
The Victoria and Albert Museum's embroidery collection documents how these traditions moved across regions and centuries. For a closer look at how handwork holds up at a professional level, see our guide to the best custom embroidery for hotels.
Hand Embroidery Techniques for Beginners: Your First Stitches
Start with five stitches and you can complete almost any beginner pattern. The goal is not perfection. It is learning how thread behaves in fabric.
Running Stitch, Backstitch, and Chain Stitch
These three form the backbone of hand embroidery techniques for beginners. They are simple, forgiving, and endlessly useful.
- Running stitch: a straight in-and-out line, ideal for outlines and basting
- Backstitch: a solid, connected line for crisp lettering and borders
- Chain stitch: linked loops that create texture and flowing curves
Practice each on a scrap of cotton before you touch a finished project. A common mistake is pulling thread too tight. Let it rest on the surface.
Satin Stitch and Buttonhole Stitch for Clean Edges
Satin stitch fills small shapes with smooth, parallel threads. Buttonhole stitch, also called blanket stitch, wraps an edge so it stays tidy and strong. Both demand even tension. Keep your stitches close and your needle angle consistent.
Types of Embroidery Techniques: From Counted-Thread to Surface Work
Embroidery splits into two broad families: counted-thread work, where stitches follow a grid in the fabric, and surface work, where the design sits on top of the cloth. Regional styles then layer local materials and motifs on top of both. Understanding how the three relate is what separates a stitched design from an authentic one.
Counted-Thread, Surface, and Regional Styles Compared
| Technique Family | How It Works | Best For |
|---|---|---|
| Counted-thread | Stitches counted on an even-weave grid | Cross stitch, geometric borders, samplers |
| Surface embroidery | Free stitching over a traced design | Crewelwork, floral motifs, goldwork |
| Regional styles | Local motifs, threads, and stitch direction | Cultural and heritage pieces |
Counted-thread embroidery includes cross stitch and many sampler traditions. Surface embroidery covers crewelwork, goldwork, and silk embroidery. Regional examples include Phulkari from Punjab. Our floral monogram frame linen napkins show how surface and monogram work sit side by side on a finished piece.

Regional Techniques Compared by Materials, Stitch Direction, and Use
Regional traditions are not interchangeable decorations. Each one grew out of the fibers, dyes, and tools available locally, and each carries rules about stitch direction and placement that a maker should learn before borrowing a motif.
| Tradition | Region of Origin | Characteristic Materials | Stitch Direction and Structure | Typical Use |
|---|---|---|---|---|
| Phulkari | Punjab | Silk floss on hand-spun cotton | Darning stitch worked from the back, with long floats on the front | Shawls, head coverings, ceremonial cloths |
| Kantha | Bengal | Running stitch with cotton or silk thread, often on layered cloth | Straight running stitch in parallel lines that quilt and embroider at once | Quilts, wraps, household textiles |
| Crewelwork | England | Two-ply wool on linen twill | Free surface stitches, stem, satin, chain, following a drawn design | Bed hangings, cushions, upholstery |
| Goldwork | Europe and South Asia | Metal-wrapped thread, purl, and plate | Couched metal laid on the surface, secured with silk thread | Ecclesiastical vestments, ceremonial dress, regalia |
| Blackwork | England | Silk or cotton thread on even-weave linen | Counted geometric patterns, often reversible | Collars, cuffs, samplers |
A common pattern is that traditions built on long floats, such as Phulkari, prioritize coverage and sheen, while traditions built on counted stitches, such as blackwork, prioritize precision and reversibility.
How to Identify and Reproduce Historically Accurate Techniques
Authenticity is a research habit, not a single stitch. Most practitioners find that three questions settle whether a technique is period-appropriate: what fiber was available, what tool made the stitch, and what the finished object was used for.
- Check the fiber first. Wool, linen, silk, and cotton each behave differently under tension. A crewel design worked in cotton will not drape like the original wool.
- Match the stitch structure, not just the look. Goldwork is couched, not pierced through the metal; reproducing the shine with polyester thread misses the mechanism.
- Read museum records. The Victoria and Albert Museum's embroidery collection and the Cooper Hewitt collection publish material descriptions and dates that help you match thread and ground cloth.
Watch out: presenting a culturally specific technique as generic decoration strips it of context and can misrepresent the source community. Credit the tradition and the region in your project notes, and learn from makers or institutions connected to that tradition rather than from secondhand summaries alone.
Hand Embroidery Tools and Materials That Hold Up
Good tools make hand embroidery techniques easier to learn and kinder on your hands. You do not need much, but you do need the right basics.
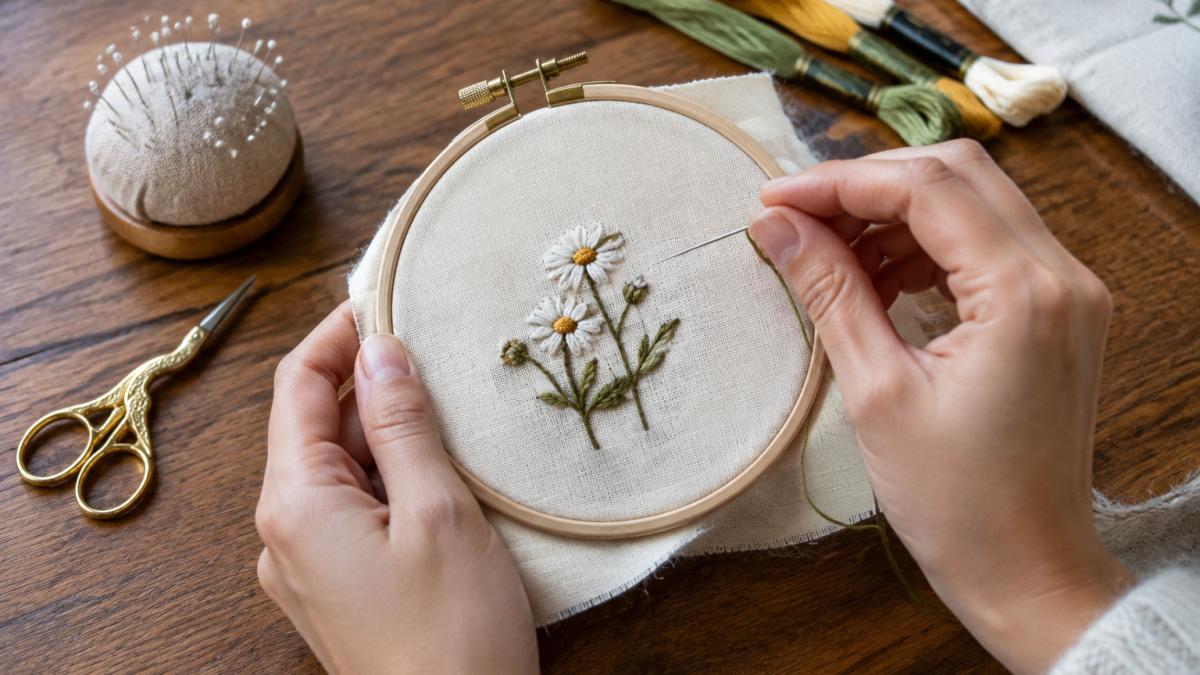
The essential kit:
- Needles: sharp embroidery needles in assorted sizes
- Thread: embroidery floss, silk floss for sheen, or pearl cotton
- Fabric: linen, cotton, or an even-weave blend
Fabric choice matters most. A sturdy linen or cotton holds stitches without stretching. Our embroidered jasmine bed sheets in 600 thread count Pima cotton show how a quality base cloth keeps embroidery looking crisp over years of use.

How to Transfer Embroidery Patterns Without Damaging Fabric
Pattern transfer is where many beginners damage fabric before the first stitch. The safest method depends on your cloth, your design, and how the finished piece will be washed. Treat transfer as the first step of a project workflow rather than an isolated trick.
Match the Transfer Method to the Fabric
| Method | Works Best On | Avoid On | Why |
|---|---|---|---|
| Window or light-box tracing with a water-soluble pen | Light-colored cotton and linen | Dark or tightly woven cloth | The pen needs to show through and rinse out |
| Transfer paper and stylus | Smooth, firmly woven fabric | Loosely woven or napped cloth | Pressure pushes pigment into the weave |
| Heat-transfer pen and iron | Cotton and linen that tolerate heat | Silk, synthetics, or heat-sensitive blends | Irons can scorch or set marks |
| Dressmaker's carbon and tracing wheel | Sturdy utility cloth | Delicate or sheer fabric | The wheel can distort the weave |
| Prick-and-pounce with chalk | Large or repeat designs | Small, detailed motifs | Chalk lines are coarse |
A Reliable Transfer Workflow
- Test first. Try your chosen method on a scrap of the same fabric, then wash and press the scrap to confirm the marks release.
- Press the fabric flat. Wrinkles distort the traced line before you ever stitch.
- Secure the pattern. Tape the design and fabric to a window or light box so neither shifts mid-trace.
- Keep lines light. Heavy marks can stain delicate linens and are harder to cover with stitches.
- Stitch over the line, not through it. Aim for the center of the traced mark so the finished line stays crisp.
Watch out: pressing too hard with transfer paper leaves ghost lines that never wash out, and heat-transfer pens can set permanently if the iron is too hot.
Carrying the Project Through to a Finished Piece
Transfer is only the second step in a workflow that most guides split across separate pages. A complete sequence looks like this:
- Choose the fabric and thread together. A sturdy linen or cotton holds stitches without stretching; match thread weight to the ground cloth so the embroidery does not pull it out of shape.
- Hoop or frame the fabric. It should feel firm, like a stretched canvas, not rigid.
- Transfer the design using the method that suits the cloth.
- Work the stitches in an order that keeps the fabric stable, outlines first, then fills.
- Finish the back. Secure thread tails with small backstitches rather than knots, which create lumps under a frame.
- Block and press. Mist the back lightly, press face down over a towel, and let the piece dry flat.
Our embroidered jasmine bed sheets in 600 thread count Pima cotton show how a quality base cloth keeps embroidery looking crisp over years of use, and our hemstitched bee design linen napkins show what careful finishing looks like in practice: clean edges, even stitches, and a hem that holds through washing.

Troubleshooting Puckering, Loose Stitches, and Fabric Slips
Most embroidery problems come down to tension and fabric support. Fix those two and the rest follows.
- Puckering: fabric is pulled too tight in the hoop or stitches are too close
- Loose stitches: thread tension is too slack, or the stitch length is uneven
- Fabric slips: the hoop is not gripping, so add a layer of tissue or use a frame
A common mistake is hooping fabric drum-tight. It should feel firm, like a stretched canvas, not rigid. If a stitch goes wrong, unpick it gently with a needle tip rather than pulling the thread back through the fabric.
Finishing, Care, and Long-Term Preservation of Handcrafted Embroidery
How you finish and wash a piece decides whether it lasts a season or a generation. Handcrafted embroidery deserves gentle handling.
Care basics for embroidered linens:
- Wash in cool water with a mild detergent
- Skip bleach and fabric softener, which break down fibers
- Air dry flat or tumble on low
Our hemstitched bee design linen napkins show what careful finishing looks like in practice: clean edges, even stitches, and a hem that holds through washing.
Choosing Your First Handcrafted Embroidery Project
Pick a project that matches your current skill and gives you a reason to finish. Small, useful pieces teach more than ambitious ones you abandon.
Start with items that let you practice the basics:
- A monogrammed napkin or hand towel
- A simple floral motif on a pillowcase
- A baby blanket with a single border design
When you are ready to apply your skills to a real piece, learn how to order custom embroidered napkins for an event and see how a finished project comes together.
Mastering authentic handcrafted embroidery techniques takes time, but the payoff is a piece that feels truly yours.
Frequently Asked Questions
What are the main types of hand embroidery techniques?
The main types are counted-thread embroidery, where stitches follow a grid in the fabric (cross stitch is the most familiar), and surface embroidery, where stitches sit on top of the fabric following a printed or transferred design. Regional styles like crewelwork, goldwork, silk embroidery, and Phulkari sit within these two families. Most beginners start with surface stitches such as running stitch, backstitch, and satin stitch before moving to counted-thread work, which demands more precision with stitch direction and tension.
Which embroidery stitches are best for beginners?
Start with running stitch, backstitch, and chain stitch. These three teach you tension control and stitch direction without demanding perfect spacing. Once those feel steady, add satin stitch for filling shapes and buttonhole stitch for clean edges. Practice each on a scrap of the same fabric you plan to use for your project, because linen-cotton blends behave differently from plain cotton. A small practice square of 10 to 15 stitches per technique builds the muscle memory you need before starting a real piece.
How do you keep hand embroidery from puckering?
Puckering usually comes from pulling thread too tight or working without enough fabric tension. Keep your fabric drum-tight in an embroidery hoop or frame, and let the thread lie flat rather than tugging each stitch. Use a needle size matched to your thread and fabric weight, and avoid long stitches that span more than about 1 inch, since they loosen over time. If a section starts to ripple, loosen the hoop, smooth the fabric, and re-hoop before continuing rather than stitching over the problem.
What tools and materials do you need for hand embroidery?
You need an embroidery hoop or frame, embroidery needles in a few sizes, embroidery floss or silk floss, small sharp scissors, and a fabric suited to your project. Linen-cotton blends hold stitches well and resist distortion. Add a water-soluble or heat-transfer pen for pattern transfer, a thimble if you work dense stitches, and a needle threader for fine eyes. A stand helps for larger pieces where holding a hoop for hours becomes tiring. Start with a 6 to 8 inch hoop and expand as your projects grow.
